As mentioned on the blog previously, I followed Richard Johnston's instructions to convert a set of coloured toy handbells into a decent set of practice bells by fitting them with better clappers and leather handles. Here's what you end up with:


It's amazing how good they sound, considering that the bells are made of pressed steel and are all the same size; the tuning comes from small differences in the profile. You can hear them ringing here.
Richard has put his instructions, with drawings and photos, on the web here for anyone to use. I'm going to describe how I used his instructions, with a couple of adaptations, to make my set. I will also give links to suppliers of the necessary materials. I recommend reading his instructions as well as my description, as he has some nice drawings to complement the photos.
Materials
- A set of bells. There are various suppliers, or you might already have a set. Note that there are two sizes of bell; I used the larger size. A suitable set is available from Hobgoblin Music for £29.95 + postage. It is most common to find sets of 8, but with a bit of searching you can find a large chromatic set containing enough bells to give you a diatonic 12. Finding a supplier in the UK might be more difficult.
- One packet of Robart Super Hinge Points (ROB310) from Balsamart (£7.99 + postage). There are 15 in a packet, which is awkward if you want to make two sets of handbells. These hinges are a key part of Richard's clapper design. There are different sizes of hinge. Richard's instructions describe the use of a 1/8 inch hinge, but in a separate note he recommends the 3/16 inch size instead, which is what I used.
- Assorted O-rings. You can get these in small packets from B&Q, but it's better value to buy "O Rings Rubber 550 Pieces" from Screwfix (£20.10 + postage). The extras are bound to come in useful one day.
- 3/4 inch Fairline rubber tap washers. You need 16. B&Q sell them in packs of 2. My original instructions said that it would be cheaper to buy a larger pack from Screwfix, but when I tried that they turned out to be larger and unsuitable.
- Windscreen washer hose, or similar flexible plastic tube with 3mm internal diameter. I got it from Halfords (£1.99).
- Glue suitable for plastic.
- For the handles, 2 of Natural Cowhide Strip 3/4 inch x 50 inch from The Identity Store (£9.87 each + postage). If you can find old leather belts of a suitable size, you can save money here.
- For the caps, 1 of Natural Cowhide Strip 1.5 inch x 50 inch from The Identity Store (£14.81 + postage). Again, you might be able to save money by recycling leather belts.
- No. 4 x 1/2 inch countersunk woodscrews. A pack of 200 is less than £2 in B&Q.
- Insulating tape.
Tools
- Stanley knife or similar.
- Junior hacksaw.
- Electric drill with 3/4 inch flat bladed wood boring bit.
- Screwdriver.
- Pliers.
- Steel rule.
- If you want to stamp the note names into the handles, then you need a Craftool 1/2 inch Block Alphabet Set from The Identity Store (£32.79 + postage), and a hammer.
Instructions
1. Pull the springy clapper shafts out of the handles, and pull the clapper balls off the springy shafts. This takes quite a lot of force. Discard the springs but keep the clapper balls.
2. Cut a small groove around the equator of each clapper ball. I did this with a junior hacksaw, which is rather fiddly. If you have a small lathe then that would make it easier. Richard pointed out that you can improvise a lathe by mounting an electric drill in a stand, gripping the clapper ball in the drill chuck, and using a knife or chisel to cut the groove.
3. Fit an O-ring of a suitable size onto the groove around each clapper ball. This is to deaden the sound slightly when the bells are rung. It's worth gluing the O-rings in place, as otherwise they tend to spring off while ringing or handling the bells.

4. Now make the clapper assemblies. This is the first clever part of Richard's design, based on the Robart Super Hinge Point.

I found that some of the hinges seemed rather stiff, so I used a knife and pliers to deform the rivet until they became looser. Push a tap washer onto one side of the hinge; it should rest against a little corner on the hinge. The washer will be held in place by a length of windscreen washer tube pushed onto the hinge behind it. Onto the other side of the hinge push a small slice of windscreen washer tube, followed by another tap washer, followed by another short length of tube to keep it in place. Before and after adding the second washer, it looks like this:


The tap washers are the second clever part of Richard's design. They give just the right amount of spring to let the clapper strike the bell and then bounce off slightly.
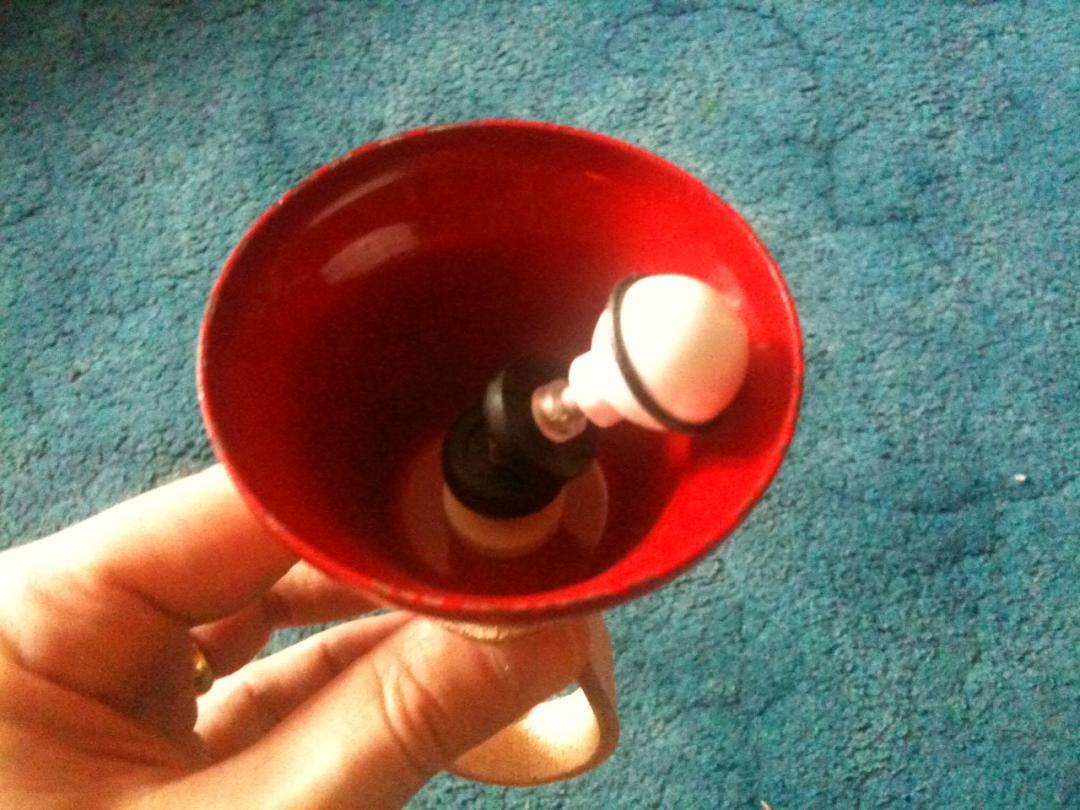
One end of the hinge needs to be cut short so that it will fit into the hole in the plastic handle of the bell. Now put the clapper ball onto the hinge above the second tap washer. It might fit snugly, or you might need to wrap some insulating tape around the hinge first. Richard added some weight below the clapper ball, but I didn't find it necessary. The completed clapper looks like this:

5. Now try pushing the clapper into the hole in the plastic handle. Eventually it will be glued in, but first you need to adjust the lengths of the various sections of windscreen washer tube in order to get the clapper striking the bell in a reasonable place. After a bit of trial and error with the first clapper, it should be straightforward to make the others.
6. It's best to make and fit the handles before gluing the clappers in, because it's easier to align the clapper with the handle than the other way around. To make the caps, use the 1.5 inch leather strip and cut out a circle of the same diameter as the crown of the bell. I marked the circle and then cut it out with a Stanley knife. You also need to drill a hole in the centre of the cap so that it will fit onto the plastic handle of the bell. On my set, a 3/4 inch drill but was about right. It is probably easiest to mark out the circle for the cap, then drill the hole, then cut out the cap. Before pushing each cap onto the handle, I put on an O-ring in order to get a little separation between the bell and the cap. This is not really necessary, but I think it looks nice.
7. To make the handles, cut suitable lengths from the 3/4 inch leather strips. Mine are 25 cm. If you are going to stamp the note names onto the handles, do it before fixing them to the bells. Then hold the leather onto the plastic handle of the bell, and put a screw through the leather and into the plastic. I found it easy to do this without drilling any starter holes. Richard used rivets, which requires drilling a hole in the handle and through the leather, and then using a hand riveting tool to insert the rivet. I tried this but I couldn't get it to work. Richard thinks that I might have been using too short a rivet; also, it was the first time I had tried to use a riveting tool. Anyway, using a screw instead is easy and looks fine. Put in one screw on each side of the handle. If you want to fix the leather more firmly to the plastic handle, you could put in additional screws further up, but I don't think it's necessary.

8. Finally, glue the clappers into the handles, making sure to align the plane of the clapper's swing with the plane of the handle.
You now have a perfectly ringable, and easily portable, set of handbells for £135.26 (+ delivery charges), which is less than half the cost of one size 15 bell from Whitechapel. If you already have a set of toy bells then the cost comes down to £105.31, and if you don't bother with the letter stamps then it's only £72.52. Even then you have a lot of spare O-rings, washers, screws and leather, so the cost of making a second set would be lower.
Happy ringing!

Comments
Replacement balls
Replacement clapper balls